

How to Do Muscle Scraping at Home: Step-by-Step Guide
Ever felt that stubborn knot in your shoulder which simply will not go away at all? It is pressed, it is stretched, and that is all. Nothing works since the device is unresponsive.
Muscle scraping comes right in at that point.
This guide teaches you how to scrape muscles well and without risk in your home. No fancy medical terms. Anyone can follow just clear simple steps now.
Covered will be mastering proper technique, avoiding common mistakes, and choosing the right tools. You’ll see what actually works coupled with this basis on proven methods.
This is a practical approach for helping your muscles to make a faster recovery. Allow for us to try to improve on your feelings.
What Is Muscle Scraping?

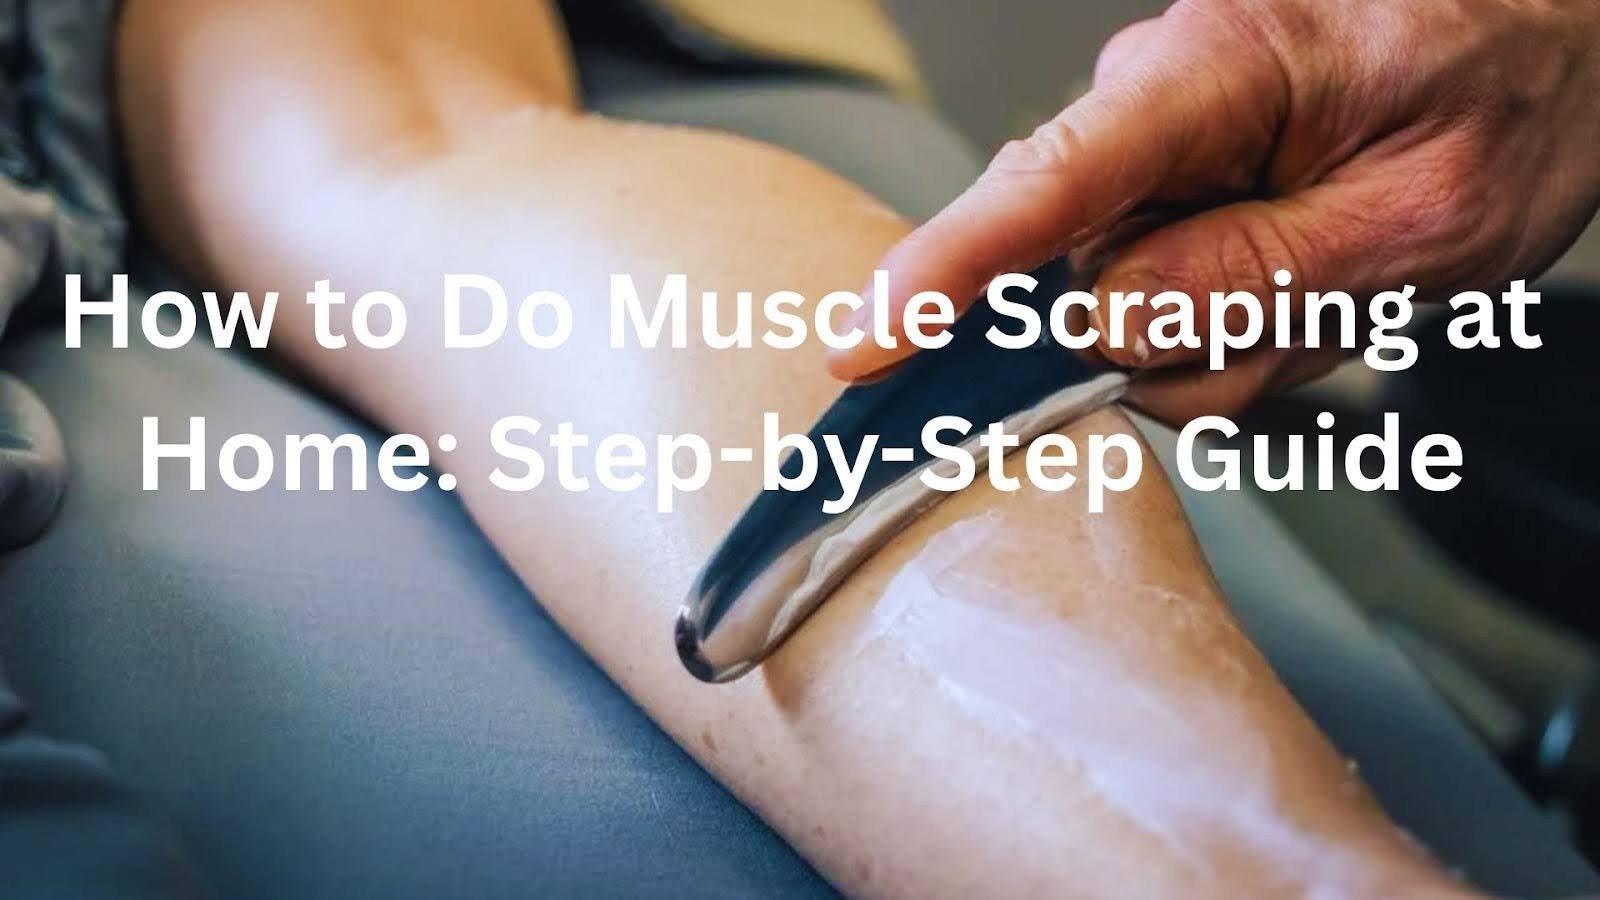
Muscle scraping is a hands-on therapy that targets tight muscles and connective tissue. You use a specialized tool to stroke your skin in specific patterns. This process helps release tension and improves how your muscles feel and move.
The practice started thousands of years ago in China as Gua Sha. Traditional healers used smooth stones to scrape the skin and promote healing. In the 1990s, physical therapists developed modern versions like IASTM and the Graston Technique using stainless steel instruments.
Your muscles develop tiny adhesions from injuries, overuse, or poor posture. Muscle scraping breaks up these restrictions mechanically. Blood flow increases to the treated area. Your body sends repair cells to break down old scar tissue.
The technique also stimulates nerve endings, which can reduce pain signals. The result is better mobility, less stiffness, and improved muscle function.
Safety Considerations
Skip this technique if you have deep vein thrombosis, varicose veins, active infections, open wounds, or recent surgery sites. Blood thinners increase bruising risk significantly. Pregnant women should consult their doctor first.
Learning proper technique matters. Consider seeing a certified practitioner for your first few sessions. They can show you correct angles and pressure. Physical therapists trained in IASTM understand anatomy deeply and know which areas to avoid.
At-home scraping works well for maintenance between professional sessions. Start conservatively. Too much pressure causes excessive bruising and tissue damage. If pain increases or you develop significant bruising, stop immediately.
Step-by-Step Guide: How to Do Muscle Scraping at Home
Follow these four simple steps to safely perform muscle scraping on yourself.
1. Choose Your Tool

Stainless steel instruments are the professional standard. They’re durable, easy to clean, and provide good feedback.
Gua Sha stones made from jade or rose quartz are gentler and suit beginners. Sidekick tools are designed for self-treatment with better leverage. Start with one versatile tool.
2. Prepare Your Body

Never scrape cold muscles. Spend five to ten minutes on light cardio like walking or cycling. Do dynamic stretches to prepare the specific area.
Apply massage oil, coconut oil, or lotion to reduce friction. You need enough to let the tool glide smoothly.
3. Use Proper Technique

Hold your tool at 30 to 45 degrees to your skin. Never hold it perpendicular. Work in one direction only with smooth two-inch strokes. Apply moderate pressure that feels productive but not painful.
Cover the entire muscle area systematically. Work along the muscle fibers, not across them. Avoid scraping directly over bones or joints. Small areas need three to five minutes. Larger muscles need ten to fifteen minutes.
Light pink or red skin is normal. Small areas of light bruising can occur. Significant bruising means you used too much pressure.
4. Post-Scraping Care

Stretch the treated muscle gently for 20 to 30 seconds. Try light strengthening exercises to activate the area. Drink extra water to flush out waste products. Rest the treated area for the remainder of the day.
Benefits of Muscle Scraping
Here’s why muscle scraping works so well for recovery and pain management.
- Pain Relief: Tight muscles cause discomfort throughout your body. Muscle scraping targets these problem areas directly and releases muscle spasms. Many people find relief from chronic aches they’ve dealt with for months.
- Improves Circulation: The strokes bring fresh blood to the treatment area. Better circulation means faster healing and reduced inflammation. Your body can clear out metabolic waste more efficiently.
- Reduces Scar Tissue: Scar tissue is tougher and less flexible than healthy tissue. Muscle scraping breaks down these adhesions gradually and remodels scar tissue into more functional tissue. The treated area becomes more pliable and responsive.
- Boosts Recovery: Athletes use muscle scraping to maintain peak performance and speed up recovery after hard workouts. Your muscles contract and relax more effectively after treatment. Range of motion improves, helping prevent future injuries.
Tips for Effective At-Home Muscle Scraping
These practical tips will help you get the most out of each session while avoiding common mistakes.
- Start with less pressure than you think you need. Test on a small area first. Focus on larger muscle groups like forearms, calves, quadriceps, and hamstrings.
- Plan for two to three sessions per week. Regular gentle sessions beat occasional aggressive ones. Never scrape to the point of excessive bruising. Avoid inflamed joints completely.
- Keep notes on what works. Track which areas respond well. Clean your tools after every use with soap and water or rubbing alcohol.
Conclusion
Learning how to do muscle scraping has greatly altered my recovery practices at home. I used to feel stubborn tightness limit my movement, but now I move more, also I feel energized.
Real are the benefits from: improved blood flow, reduced discomfort, and faster bounce-back following training sessions.
Use a proper technique with all of the right tools and remember that you must listen to your body. Stop at once in the event that something feels wrong. For those with serious injuries, see a professional.
Are you prepared to see the difference? Use your scraping tool tonight then spend five minutes on calves or forearms. You must get ready at that time. It will be appreciated by and for your body.
Frequently Asked Questions
Can I do muscle scraping every day?
Limit sessions to two or three times per week. Your body needs rest between treatments to heal and rebuild tissue properly.
How much bruising is normal after muscle scraping?
Light pink or red marks are normal. Significant dark bruising means you used too much pressure.
What’s the difference between muscle scraping and foam rolling?
Foam rolling uses broad pressure with body weight. Muscle scraping uses targeted strokes with a handheld tool for precision work.
Can muscle scraping help with cellulite?
It may temporarily improve skin texture through increased circulation. However, it’s not a proven cellulite treatment since cellulite involves structural fat and tissue issues.
How long before I see results from muscle scraping?
Many feel immediate relief in mobility and tightness. Lasting changes to chronic issues take four to six weeks of consistent treatment.